
Home : Workshop : CNC : Estlcam :
 As with any Estlcam probe function, the probe plate can be a simple piece of aluminum (tape) wired to a "probe" input. Using the one click automatic tool length measurement function speeds up and simplifies tool changes, no probe menu navigation or manual touch off required. While a 3-axis probe plate makes a handy sensor, a spoilboard mounted sensor is needed if the surface of the material will be machined away.
To setup the sensor go to Setup : CNC controller : Length sensor. I use a speed of 60mm/min for all automatic probing functions. Back off distance can be whatever you want. V12 has additional options, Mode: 'Manual: Free on machine' (sensor on bed or material) works the same as v11. Using the optional v12 'Sensor active' options requires setting the input to length sensor. Sensor height should be 0. The settings fixed location option requires homing be enabled, but a fixed location at, or relative to, the project origin/0,0 point is also possible (Setup: CNC program : Texts : Tool change).
Warning: Unlike other probe options, the Z-axis will start moving when you click the icon. When you move the tool over the sensor and click the icon, the tool will automatically travel down, touch and retract.
After the first touching off of the tool length sensor, the material top also needs to be touched off/zeroed. After that the sensor will automatically adjust the Z-axis zero point after tool change sensor probes. Notes: 1) After a sensor touch off, Esc does nothing and the message will only go away when you do something else. 2) The default 6mm/min speed is typo - super slow, pretty much undetectable (v11.244). 3) The offset is lost when the controller window is closed.
I have not tried the v12 Mode: 'Manual: on workpiece' which requires 'Sensor height' be set to plate thickness or switch trigger Z height. The advantage is that taking a length measurement is all that's needed (no one time manual Z zeroing). The disadvantage is that it only works with the sensor on top if the material.
[ comment | link | top ]
 The calibration distance should be as big as possible, the closer to the axis limits the better. I used what I hope is an accurate steel rule and fixed one end (clamp just before 100mm/axis 0) securely to the spoilboard. Eyeball measurements aren't very accurate so I used a 20 degree engraving bit, a flashlight and a magnifier. Getting the flashlight centered behind the bit, getting the bit as low as possible and rotating the bit (because of the flutes, the tip appears to move from side to side and centering it in the grove can be tricky) all helped.
Estlcam storing the X/Y origin/coordinates makes adjustments to the distance per revolution (DPR) setting easy. My example distance was 650mm (axis zeroed @ 100 and moved to 750 on the ruler) and the controller coordinate read 649.91, i.e. .09mm shy. My 650 distance / my 8 DPR = 81.25 revolutions and 81.25 / .09 shy = .001 so I bumped my DPR from 8mm to 8.001 and after reprogramming the controller the coordinate read 649.99. In reality it was not that simple and the new coordinate may not match the math perfectly due to the changed revolutions (81.24@8.001 VS 81.25@81.25), but you can see how longer distances are more accurate (.09 @ 650 is only .014 @ 100mm).
Ruler distance / DPR = revolutions, (ruler +/- coordinate distance) / revolutions = DPR +/- distance
e.g. 650 / 8 = 81.25, (650 - 649.91) .09 / 81.25 = .001, 8 + .001 = 8.001 DPR
[ comment | link | top ]
Controller
The Estcam motion control program is easy to flash onto a lot of 8bit ATmega microprocessor/GRBL compatible hardware (e.g. Uno/Nano) and Estlcam will backup anything currently installed on the hardware. If the hardware isn't recognized, USB drivers may need to be installed (drivers for FTDI or WCH serial chips are the most common).
See also: Setup : Controller and Hardware
![]()
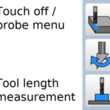
Tool Length Sensor
 As with any Estlcam probe function, the probe plate can be a simple piece of aluminum (tape) wired to a "probe" input. Using the one click automatic tool length measurement function speeds up and simplifies tool changes, no probe menu navigation or manual touch off required. While a 3-axis probe plate makes a handy sensor, a spoilboard mounted sensor is needed if the surface of the material will be machined away.
To setup the sensor go to Setup : CNC controller : Length sensor. I use a speed of 60mm/min for all automatic probing functions. Back off distance can be whatever you want. V12 has additional options, Mode: 'Manual: Free on machine' (sensor on bed or material) works the same as v11. Using the optional v12 'Sensor active' options requires setting the input to length sensor. Sensor height should be 0. The settings fixed location option requires homing be enabled, but a fixed location at, or relative to, the project origin/0,0 point is also possible (Setup: CNC program : Texts : Tool change).
Warning: Unlike other probe options, the Z-axis will start moving when you click the icon. When you move the tool over the sensor and click the icon, the tool will automatically travel down, touch and retract.
After the first touching off of the tool length sensor, the material top also needs to be touched off/zeroed. After that the sensor will automatically adjust the Z-axis zero point after tool change sensor probes. Notes: 1) After a sensor touch off, Esc does nothing and the message will only go away when you do something else. 2) The default 6mm/min speed is typo - super slow, pretty much undetectable (v11.244). 3) The offset is lost when the controller window is closed.
I have not tried the v12 Mode: 'Manual: on workpiece' which requires 'Sensor height' be set to plate thickness or switch trigger Z height. The advantage is that taking a length measurement is all that's needed (no one time manual Z zeroing). The disadvantage is that it only works with the sensor on top if the material.
[ comment | link | top ]
Motion Controller Features
I haven't seen an Estlcam motion controller (ATmega328/2560 firmware/interface) feature list (that you can compare to GRBL/sender interfaces) so I thought I would start one... Updated to include some v12 changes.
[ comment | link | top ]
- Tool change support
- M06 pause w/ message box (automatically added by Estlcam CAM)
- manual or 1-click Z probe/0 reset
- v12: tool length table (ATC or collars)
- Spindle on/off and PWM speed control
- keyboard, mouse or (Estlcam CAM auto inserted) G-code
- v12: input, hotkey(s) and macro switchcable
- Program (machining) start/pause
- mouse or momentary switch control (plus Esc or G-code pause)
- v12: configurable hot key(s)
- anything can be done during a pause (or F11 released "stop")
- program can be resumed (or started) at any point in the G-code
- restarted interface will offer a remembered resume point
- Stored origins and paused coordinates
- origins remembered until changed, no shutdown loss
- automatic (offer to) resume from paused coordinates
- Program end rewind
- click play icon to run the G-code again
- Eight direction continuous (or step by step) jog
- keyboard, mouse, wire(d/less) numpad, joystick, XBox gamepad, MPG pendant
- v12 has new mouse wheel options and changes to supported hardware
- five or variable speed jog
- command box incremental (default) or absolute jogging, (a)axis distance
- keyboard, mouse, wire(d/less) numpad, joystick, XBox gamepad, MPG pendant
- On the fly feed and speed control
- keyboard, mouse, remote or potentiometer
- Inputs:
- Conductive block or tape probing/touch-off
- manual nine direction w/ auto reverse
- spinning bit tape probing (accurate straight flute touch-off)
- circle or rectangle (w/ angle comp) center finding
- v12: edge intersection and circle center to circle angle comp
- auto 3 axis corner (w/ angle comp)
- auto cycle Z zero tool change
- 3D Surface scan
- Homing/limit input switches
- any (set to 'limit switch') input pin(s) can be used
- (all) switches can be wired in series (NC, w/ Invert) or parallel (NO)
- none required
- v12: macros (input or hotkey) and more
- Conductive block or tape probing/touch-off
- Outputs:
- mouse or G-code (M08/9 on, M10/11 off) control
- v12: auto G-code insertion, hotkey and custom icon support
- Command entry box
- xy - goto X,Y origin
- goto [foo] - G-code search w/ path highlighting (v12: go [foo])
- abs/rel - switch between machine (abs) and workspace (rel) coordinates
- 'axis distance' incremental move, A'axis distance' absolute move
- v12: all command line options can be used in v12 macros
- etc.
- Drag knife support - adds pivot offset to paths
- v12: on the fly surfacing tool
- v12: some hideable tool icons
- Compatibility:
- G-code:
- G00-G03, I/J, F/S, M00-M11 sans M02/4/7
- all coordinates are relative to project origin (absolute, no G90/91 switching)
- unsupported G-code is ignored
- Hardware:
- most ATmega328/2560 based hardware, e.g. Arduino and many GRBL boards
- G-code:
[ comment | link | top ]
Axis Calibration
 The calibration distance should be as big as possible, the closer to the axis limits the better. I used what I hope is an accurate steel rule and fixed one end (clamp just before 100mm/axis 0) securely to the spoilboard. Eyeball measurements aren't very accurate so I used a 20 degree engraving bit, a flashlight and a magnifier. Getting the flashlight centered behind the bit, getting the bit as low as possible and rotating the bit (because of the flutes, the tip appears to move from side to side and centering it in the grove can be tricky) all helped.
Estlcam storing the X/Y origin/coordinates makes adjustments to the distance per revolution (DPR) setting easy. My example distance was 650mm (axis zeroed @ 100 and moved to 750 on the ruler) and the controller coordinate read 649.91, i.e. .09mm shy. My 650 distance / my 8 DPR = 81.25 revolutions and 81.25 / .09 shy = .001 so I bumped my DPR from 8mm to 8.001 and after reprogramming the controller the coordinate read 649.99. In reality it was not that simple and the new coordinate may not match the math perfectly due to the changed revolutions (81.24@8.001 VS 81.25@81.25), but you can see how longer distances are more accurate (.09 @ 650 is only .014 @ 100mm).
Ruler distance / DPR = revolutions, (ruler +/- coordinate distance) / revolutions = DPR +/- distance
e.g. 650 / 8 = 81.25, (650 - 649.91) .09 / 81.25 = .001, 8 + .001 = 8.001 DPR
[ comment | link | top ]