
Home : Workshop : Woodwork :
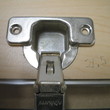 While its not a great picture, I use screw mounted cups and a piece of 3/4" aluminum angle stock, held to the outside door edge, to keep the holes parallel to the door edge. I use a Vix Bit to drill the holes. Most of what I do is half-overlay, i.e. the doors overlay the panels by 8mm. I get the best clearance, door to box and door to door or finished end, with a 6mm plate and the 35mm bit centered 20.5 - 21.5mm from the door edge. The placement happens to be ideal for the 3/4" aluminum angle spacer/aligner. Other overlays and spacings will likely require a different tool. Using a square aligned to the top/bottom edge of the door works, but isn't a very solid/dependable solution.
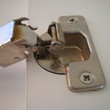 There was a post on the WoodWeb Cabinetmaking Forum (expired) about hinges tearing off the doors. I had made a comment about how I trust screws more than plastic dowels. While this is generally true, I decided to test hinges mounted with dowels. It took quite a lot of force to cause any failure and it was the hinge that failed, not the dowels. In this application, with Blum dowels/screws (dowel holding strength, at least in other application, has numerous variables and I haven't looked at other manufacturers products), I'd trust dowel mounting (Blum's spreading dowel / machine screw plate mounts also seem strong/reliable).
...I did more tests for a discussion on another forum and decided Blum's dowels are a bit stronger than screws going the same depth into the material, i.e. 5/8" screws VS 12mm (< 1/2") dowels. Using 3/4" screws (~5/8" into the material) was stronger than the dowels. This was true for both MDF and plywood (earlier test was melamine PB), with the MDF holding screws a bit better than the plywood. That MDF face grain doesn't hold screws well is a myth. Screwing into MDF does require pilot holes. Face grain pilot holes should match the screw root diameter (a hair smaller is fine). Screwing into MDF edge grain is not recommended (lousy grip and easy to split - larger pilot holes required).
[ comment | link | top ]
Doors
Nine Piece MDF Doors
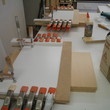
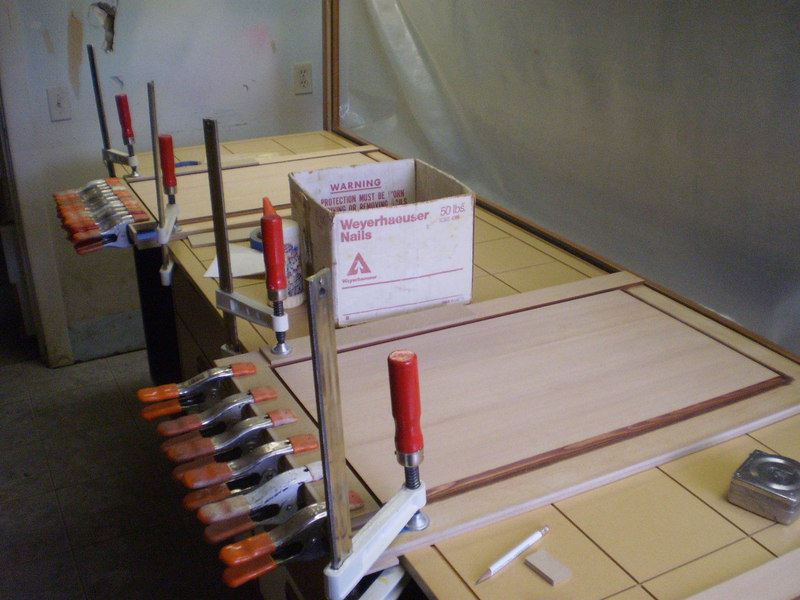
The first time I did this it was for the Wolf's Family Room and it was 13 pieces with the molding. As may/will be apparent, I use spring clamps and MDF a lot. For most folks, this method of door construction probably doesn't make much sense. Since there are so many glue cycles (I use a 30min timer), you do need space out of the way so that you can be doing other things at the same time. I do have the bits to do a few different door styles and have done Shaker doors with them in the past (e.g. the Robinson's office). What I like about this method is that it is relatively simple, you will never have problems with the center panel expanding/contracting and its stronger because of the edge to edge panel.
I have also done drawer faces using a 1/2" MDF panel and applying 1/4" MDF stiles and rails to the face. The problem here is that, when everything dries, the faces are always slightly concave. I had noticed this with wainscot (1/4" back/panel) built in a similar manner. I would have thought that the moisture in the glue would have had the opposite effect (convex) due to MDF expansion from the water in the glue. Apparently, when the glue dries, shrinkage is the overriding factor. It may be that I need to try different glues.
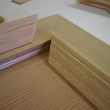
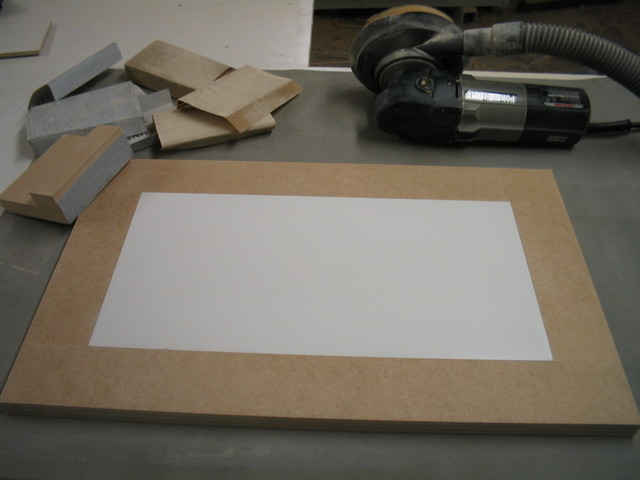
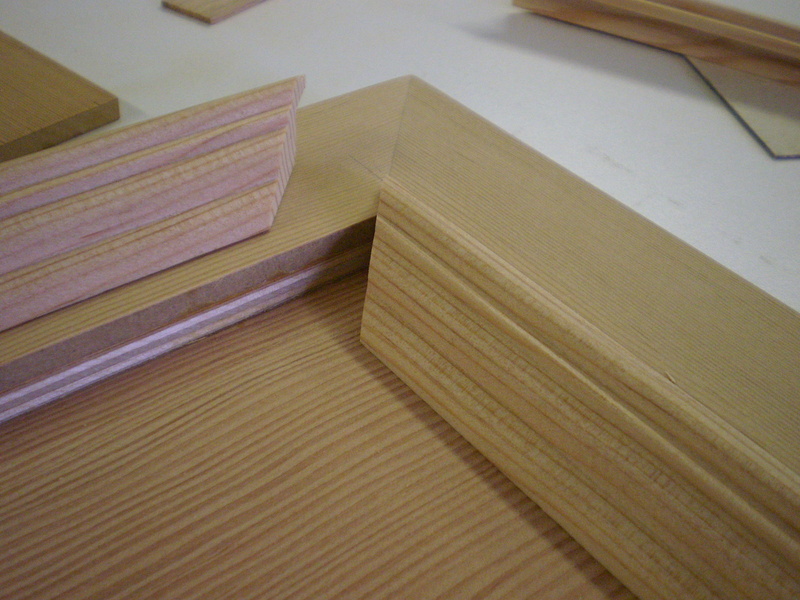
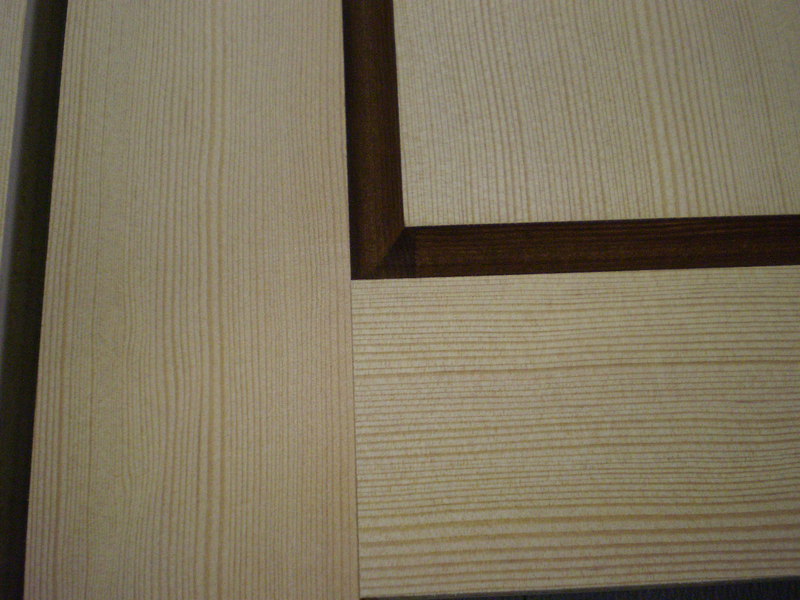
 I use scrap pieces of 1/4" back material to define the panel opening and control the location of the buildup strips. The image is stage two, gluing on the rails. Image two is a closeup. The third image shows the glued up door with the control panel (white) still in place. That pile of sandpaper is from my initial attempt at hand sanding. Using the random orbital sander was much faster. While its pretty easy to a good job with a 5" random orbital, leaving the control panel in place is good insurance (keeps the sander from rocking).
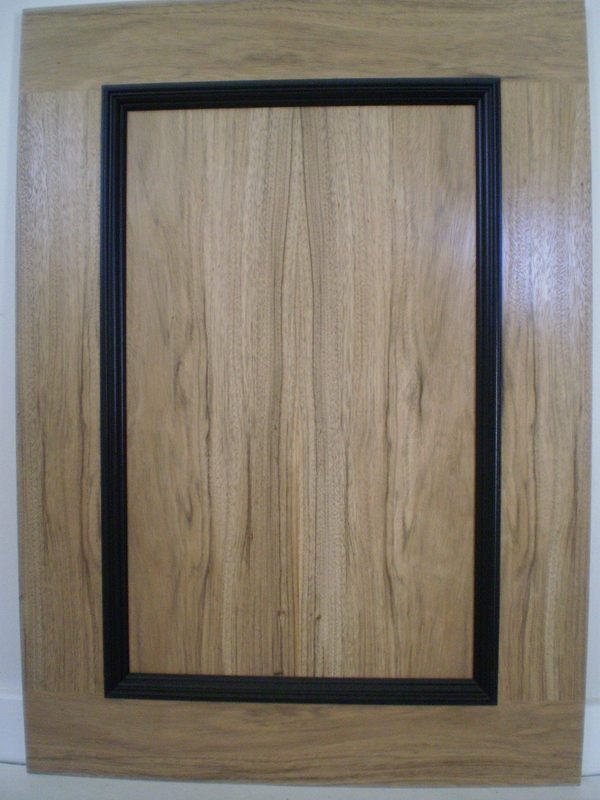
Without molding, the MDF edge around the panel needs to be sealed. As with all MDF edge prep, I use OneTime. When I was trying to describe the stuff to one of my customers he said something about it sounding like you could use a syringe. A syringe is the best solution I have found for applying OneTime to that inside edge. Spreading and cleaning off the excess does take a bit of finesse. The MDF with the sandpaper stuck to it (top left) is for sanding that inside edge after its dried.
 Oct, '10: Above I mentioned how 1/4" MDF stiles and rails glued only to the face of 1/4" MDF (with Titebond) results in a concave face. I needed to match some existing doors with the panel setback 1/2" and stacking another layer of 1/4" actually reverses the effect, my doors had a very slight but consistent crown. The top and bottom plys are veneered 1/4" MDF. It was pretty easy to get nice consistent balanced grain (much better than I was able to get with the solid cherry Shaker doors I did just before this). IIRC, the middle ply is 1/4" Appleply (5ply hardwood). I only mitered the top ply.
Jul '11: A test panel (~2x3') for a wainscot job built with 1/2" MDF stiles and rails glued to the face of 1/4" MDF - with melamine on the back side - and veneer vacuum pressed to the face of the faux fame and panel (just the visible portion) came out as flat as could be (crossing my fingers on the up to 3' x 8' panels I'll be building)... They turned out a bit concave because of the unbalanced veneer on the stile and rail stock.
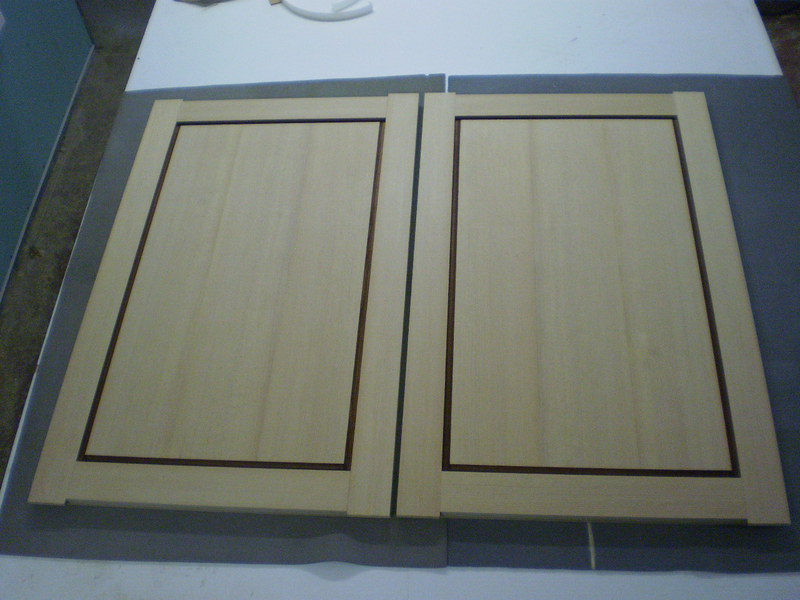
'15: A pair of veneered 6 piece doors that worked well (3/8" flat back, panel, stile and rails)...
[ comment | link | top ]
I have also done drawer faces using a 1/2" MDF panel and applying 1/4" MDF stiles and rails to the face. The problem here is that, when everything dries, the faces are always slightly concave. I had noticed this with wainscot (1/4" back/panel) built in a similar manner. I would have thought that the moisture in the glue would have had the opposite effect (convex) due to MDF expansion from the water in the glue. Apparently, when the glue dries, shrinkage is the overriding factor. It may be that I need to try different glues.
 I use scrap pieces of 1/4" back material to define the panel opening and control the location of the buildup strips. The image is stage two, gluing on the rails. Image two is a closeup. The third image shows the glued up door with the control panel (white) still in place. That pile of sandpaper is from my initial attempt at hand sanding. Using the random orbital sander was much faster. While its pretty easy to a good job with a 5" random orbital, leaving the control panel in place is good insurance (keeps the sander from rocking).
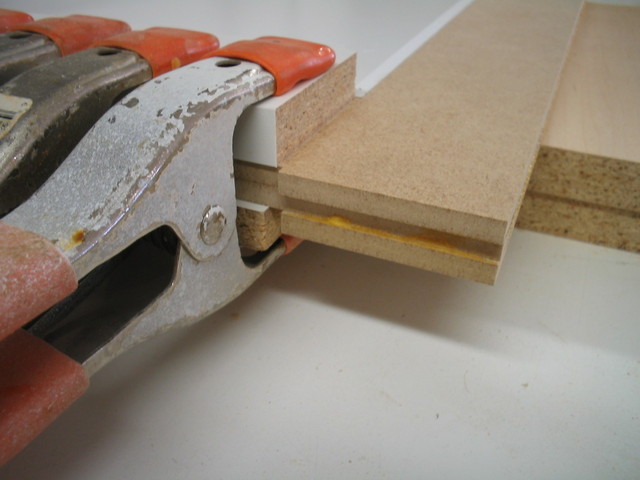
Without molding, the MDF edge around the panel needs to be sealed. As with all MDF edge prep, I use OneTime. When I was trying to describe the stuff to one of my customers he said something about it sounding like you could use a syringe. A syringe is the best solution I have found for applying OneTime to that inside edge. Spreading and cleaning off the excess does take a bit of finesse. The MDF with the sandpaper stuck to it (top left) is for sanding that inside edge after its dried.
 Oct, '10: Above I mentioned how 1/4" MDF stiles and rails glued only to the face of 1/4" MDF (with Titebond) results in a concave face. I needed to match some existing doors with the panel setback 1/2" and stacking another layer of 1/4" actually reverses the effect, my doors had a very slight but consistent crown. The top and bottom plys are veneered 1/4" MDF. It was pretty easy to get nice consistent balanced grain (much better than I was able to get with the solid cherry Shaker doors I did just before this). IIRC, the middle ply is 1/4" Appleply (5ply hardwood). I only mitered the top ply.
Jul '11: A test panel (~2x3') for a wainscot job built with 1/2" MDF stiles and rails glued to the face of 1/4" MDF - with melamine on the back side - and veneer vacuum pressed to the face of the faux fame and panel (just the visible portion) came out as flat as could be (crossing my fingers on the up to 3' x 8' panels I'll be building)... They turned out a bit concave because of the unbalanced veneer on the stile and rail stock.
'15: A pair of veneered 6 piece doors that worked well (3/8" flat back, panel, stile and rails)...
[ comment | link | top ]
Hinge Cup Mounting
 While its not a great picture, I use screw mounted cups and a piece of 3/4" aluminum angle stock, held to the outside door edge, to keep the holes parallel to the door edge. I use a Vix Bit to drill the holes. Most of what I do is half-overlay, i.e. the doors overlay the panels by 8mm. I get the best clearance, door to box and door to door or finished end, with a 6mm plate and the 35mm bit centered 20.5 - 21.5mm from the door edge. The placement happens to be ideal for the 3/4" aluminum angle spacer/aligner. Other overlays and spacings will likely require a different tool. Using a square aligned to the top/bottom edge of the door works, but isn't a very solid/dependable solution.
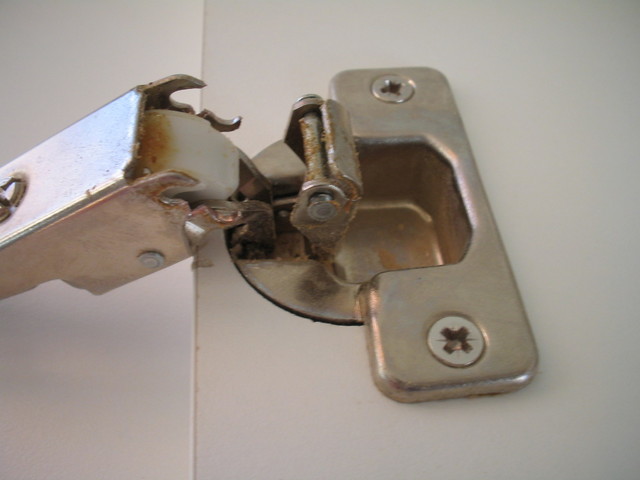 There was a post on the WoodWeb Cabinetmaking Forum (expired) about hinges tearing off the doors. I had made a comment about how I trust screws more than plastic dowels. While this is generally true, I decided to test hinges mounted with dowels. It took quite a lot of force to cause any failure and it was the hinge that failed, not the dowels. In this application, with Blum dowels/screws (dowel holding strength, at least in other application, has numerous variables and I haven't looked at other manufacturers products), I'd trust dowel mounting (Blum's spreading dowel / machine screw plate mounts also seem strong/reliable).
...I did more tests for a discussion on another forum and decided Blum's dowels are a bit stronger than screws going the same depth into the material, i.e. 5/8" screws VS 12mm (< 1/2") dowels. Using 3/4" screws (~5/8" into the material) was stronger than the dowels. This was true for both MDF and plywood (earlier test was melamine PB), with the MDF holding screws a bit better than the plywood. That MDF face grain doesn't hold screws well is a myth. Screwing into MDF does require pilot holes. Face grain pilot holes should match the screw root diameter (a hair smaller is fine). Screwing into MDF edge grain is not recommended (lousy grip and easy to split - larger pilot holes required).
[ comment | link | top ]