
Home : 32mm : Tools :
 Foolproof mating provides accurately aligned dowel joints regardless of material thickness and side fence/stop location. The only requirement is that the drill bits are centered between the table and rear fence (Z=Y). The key difference between this image and the Automatic mating one (use next/prev to switch back and forth) is that foolproof end-boring is done with the inside-face-up (panel A inside up VS down). This allows the Z constant (bit to table distance) to be used for end-boring and provides a common reference point - all panels are bored with their front (or back) edges against the side fence (or back fence stops).
 When setting the rear fence, using gauge blocks (G) a bit thicker than the maximum expected panel (P) thickness will allow leaving the fence in place while testing/setting the drill head height. Blocks close to 20mm tall should allow leaving the fence in place for all 3/4 +/- construction boring, e.g. plywood and melamine. Note: Any adjustment of the drill head height is 1:2, e.g. moving it up/back .125mm moves the A panel holes down .125, the B panel holes up .125 and the A panel outside face up .25mm.
[ comment | link | top ]
 The foolproof and auto mate images are all heavily modified versions of the one I took from a Maggi manual (pg 24 110KB pdf). The basic concept of auto mating is that the Y end-bore distance from the drill bits to the A panel face equals the Y face bore distance from the drill bits to the end of panel B (image bottom). The theory is that all holes will be an equal distance from the face of panel A and the end of panel B. The first problem is that any variation in panel thickness changes the Y end bore distance. The end-bored holes holes will be closer to, or further away from, the face of the A panel. Any variation in panel thickness translates to an equal variation in joint alignment, the A face will be above or below the end of the B panel.... more
[ page | top ]
 I use a Champ Fond LB-21 boring machine for most of my line and construction boring. I've seen a number of machines like this and, like most things made in Taiwan, its a copy of one of them. Its a full cycle machine in that hitting the foot pedal pneumatically clamps the material to the table, starts the motor, pushes the drill head up until it hits a pneumatic limit switch, lets the head drop down, releases the air clamps and turns off the motor. It has quick change collets and a hydraulic brake for through boring. It came with side fences and a rudimentary back fence. I ended up tossing the side fences and use a custom back fence for all boring... more
[ page | top ]

 I've gone through a lot of fence and stop setups. I've been using this one for a while now. The basic idea is stops that can be easily and accurately set, moved and reset to accommodate any construction or line boring start hole distance. I do too many different things on my machine to be able to set and forget my stops.
It probably depends on the machine, but I was able to set mine up so that the fence doesn't need to be moved. The stock position allows 0-38mm face boring and and all end boring (it can be moved back in 16mm increments for other tasks, e.g. moved 32mm back for inset-flush line boring). For the standard boring (line or construction) of any material thickness, the only thing that needs to change is the position of the drill head. Moving the head is easily and accurately accomplished thanks to a digital position indicator on the crank (see Flip-flop Boring Machine). See Foolproof Mating for a no move method.
The pictured fence has 4mm holes every 16mm. The construction boring stops have 4mm spring plungers (the knurled knobs) that mate with the 4mm holes in the fence. The actual material stops are M8 bolts with the tip machined flat and drilled/tapped for M4 threaded posts. The stop can be used with or without the posts and can be fine tuned by loosening the lock nut. Bolt head flats or lines on the socket head reference a ~.2mm (.208) change in the stops location. The posts are Minifix bolts machined to 1mm increments. The posts allow easy and accurate changing of the start hole distance without moving the stops, e.g. to offset leveler mounting holes 16mm from construction holes.
[ comment | link | top ]
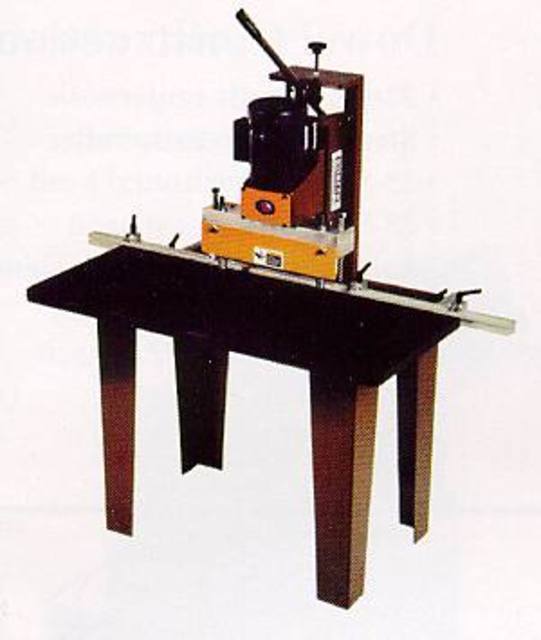
 There are a number of 13 spindle, entry level, machines on the market. The Delta, at approx. $1,000 without bits, is the least expensive I have seen. These machines are a huge step from any of the manual/jig systems and are well suited to the small shop. Here is a picture of the stock delta machine and one of the Ritter.
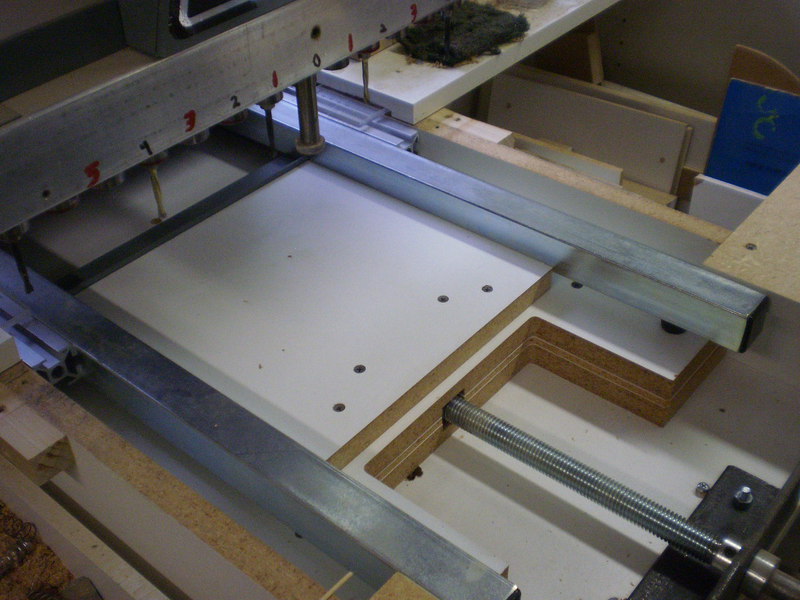
Here is a bigger picture of how I have set up my Delta. As you can see it has a much bigger table than on the stock machine. Working with 8 and even 10 ft goods is infinitely easier. I don't know if you can see the crank but the boring machine moves relative to the table. This works out very nice. It is easy and accurate. The fence is 1 1/4 square aluminum with a 1/4" slot cut in it. It can use the stops that come with the boring machine. I also use some simple block stops that fit the track as extra OEM stops run about $75 and I haven't had the time to come up with something better. I am finding I really only need a few setups and would like to leave the stops where they are.
Someone asked how I setup the machine to move relative to the table. When I made the cabinet I made some extra pieces the same width as the box. The top of the box has no cross members instead one of the extra pieces is a permanently mounted shelf a few inches down from the top. On top of this shelf sits a sandwich made from the other extra pieces. The machine is mounted to the sandwich. The sandwich contains a couple of square nuts trapped nice and tight along with a hole for a threaded rod. The front of the threaded rod has the threads ground off and passes through a piece of angle iron that is mounted to the permanently mounted shelf. The rod has a collar on each side of the angle iron. I had someone weld the crank to the rod. Turn the crank and the sandwich/machine is pulled forward or pushed back. There were some logistics to allow the full range of travel (0-6"?). There is a bit of slop in the crank but the weight of the machine and friction keep it in place. I would probably like it better if it had a slot in the shelf and something like a carriage bolt trapped in the sandwich passing through the slot with a knob on the other end to clamp the sandwich to the shelf. The machine has a ruler that was used by the small table that came with the machine. I set up a cursor, mounted to the counter top, over the ruler on the machine. The result is similar to the cursor/ruler of the Biesemeyer fence.
[ comment | link | top ]
Boring
This page is about 32mm flip-flop line/construction boring machines and the Delta 13 spindle manual boring machine.
32mm Drilling jigs now have their own page.
32mm Drilling jigs now have their own page.
Foolproof Mating
 Foolproof mating provides accurately aligned dowel joints regardless of material thickness and side fence/stop location. The only requirement is that the drill bits are centered between the table and rear fence (Z=Y). The key difference between this image and the Automatic mating one (use next/prev to switch back and forth) is that foolproof end-boring is done with the inside-face-up (panel A inside up VS down). This allows the Z constant (bit to table distance) to be used for end-boring and provides a common reference point - all panels are bored with their front (or back) edges against the side fence (or back fence stops).
 When setting the rear fence, using gauge blocks (G) a bit thicker than the maximum expected panel (P) thickness will allow leaving the fence in place while testing/setting the drill head height. Blocks close to 20mm tall should allow leaving the fence in place for all 3/4 +/- construction boring, e.g. plywood and melamine. Note: Any adjustment of the drill head height is 1:2, e.g. moving it up/back .125mm moves the A panel holes down .125, the B panel holes up .125 and the A panel outside face up .25mm.
[ comment | link | top ]
Automatic Mating
 The foolproof and auto mate images are all heavily modified versions of the one I took from a Maggi manual (pg 24 110KB pdf). The basic concept of auto mating is that the Y end-bore distance from the drill bits to the A panel face equals the Y face bore distance from the drill bits to the end of panel B (image bottom). The theory is that all holes will be an equal distance from the face of panel A and the end of panel B. The first problem is that any variation in panel thickness changes the Y end bore distance. The end-bored holes holes will be closer to, or further away from, the face of the A panel. Any variation in panel thickness translates to an equal variation in joint alignment, the A face will be above or below the end of the B panel.... more
[ page | top ]
Flip-flop Boring Machine
 I use a Champ Fond LB-21 boring machine for most of my line and construction boring. I've seen a number of machines like this and, like most things made in Taiwan, its a copy of one of them. Its a full cycle machine in that hitting the foot pedal pneumatically clamps the material to the table, starts the motor, pushes the drill head up until it hits a pneumatic limit switch, lets the head drop down, releases the air clamps and turns off the motor. It has quick change collets and a hydraulic brake for through boring. It came with side fences and a rudimentary back fence. I ended up tossing the side fences and use a custom back fence for all boring... more
[ page | top ]
Construction Boring on a Flip-flop
Maximizing accuracy and minimizing setups requires using as may constants as possible. With my flip-flop boring machine the constants are the distance between the stops on the back fence (or between the side fences), the distance between the drill head and table, and the location of the back fence. It is possible to drill all holes on all panels with with the only adjustment/setup being the location and angle of the drill head. Since 3/4" material is the most common I will use it as an example... more
[ page | comments (3) - Monday, 17-Mar-2014 | top ]
[ page | comments (3) - Monday, 17-Mar-2014 | top ]
Construction Boring Fence and Stops

 I've gone through a lot of fence and stop setups. I've been using this one for a while now. The basic idea is stops that can be easily and accurately set, moved and reset to accommodate any construction or line boring start hole distance. I do too many different things on my machine to be able to set and forget my stops.
It probably depends on the machine, but I was able to set mine up so that the fence doesn't need to be moved. The stock position allows 0-38mm face boring and and all end boring (it can be moved back in 16mm increments for other tasks, e.g. moved 32mm back for inset-flush line boring). For the standard boring (line or construction) of any material thickness, the only thing that needs to change is the position of the drill head. Moving the head is easily and accurately accomplished thanks to a digital position indicator on the crank (see Flip-flop Boring Machine). See Foolproof Mating for a no move method.
The pictured fence has 4mm holes every 16mm. The construction boring stops have 4mm spring plungers (the knurled knobs) that mate with the 4mm holes in the fence. The actual material stops are M8 bolts with the tip machined flat and drilled/tapped for M4 threaded posts. The stop can be used with or without the posts and can be fine tuned by loosening the lock nut. Bolt head flats or lines on the socket head reference a ~.2mm (.208) change in the stops location. The posts are Minifix bolts machined to 1mm increments. The posts allow easy and accurate changing of the start hole distance without moving the stops, e.g. to offset leveler mounting holes 16mm from construction holes.
[ comment | link | top ]
Delta Boring Machine
 There are a number of 13 spindle, entry level, machines on the market. The Delta, at approx. $1,000 without bits, is the least expensive I have seen. These machines are a huge step from any of the manual/jig systems and are well suited to the small shop. Here is a picture of the stock delta machine and one of the Ritter.
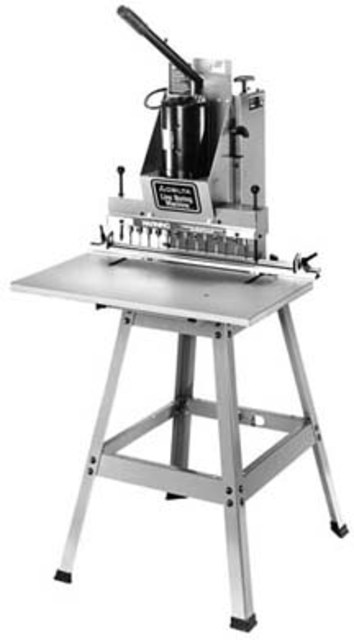
Here is a bigger picture of how I have set up my Delta. As you can see it has a much bigger table than on the stock machine. Working with 8 and even 10 ft goods is infinitely easier. I don't know if you can see the crank but the boring machine moves relative to the table. This works out very nice. It is easy and accurate. The fence is 1 1/4 square aluminum with a 1/4" slot cut in it. It can use the stops that come with the boring machine. I also use some simple block stops that fit the track as extra OEM stops run about $75 and I haven't had the time to come up with something better. I am finding I really only need a few setups and would like to leave the stops where they are.
Someone asked how I setup the machine to move relative to the table. When I made the cabinet I made some extra pieces the same width as the box. The top of the box has no cross members instead one of the extra pieces is a permanently mounted shelf a few inches down from the top. On top of this shelf sits a sandwich made from the other extra pieces. The machine is mounted to the sandwich. The sandwich contains a couple of square nuts trapped nice and tight along with a hole for a threaded rod. The front of the threaded rod has the threads ground off and passes through a piece of angle iron that is mounted to the permanently mounted shelf. The rod has a collar on each side of the angle iron. I had someone weld the crank to the rod. Turn the crank and the sandwich/machine is pulled forward or pushed back. There were some logistics to allow the full range of travel (0-6"?). There is a bit of slop in the crank but the weight of the machine and friction keep it in place. I would probably like it better if it had a slot in the shelf and something like a carriage bolt trapped in the sandwich passing through the slot with a knob on the other end to clamp the sandwich to the shelf. The machine has a ruler that was used by the small table that came with the machine. I set up a cursor, mounted to the counter top, over the ruler on the machine. The result is similar to the cursor/ruler of the Biesemeyer fence.
[ comment | link | top ]