
Home : 32mm : Tools :
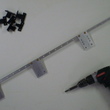 The Keku Scribe Tool makes it easy to securely and accurately index and hold trim - for marking, sizing and mounting - using Keku connectors. In Scribing Cabinet Trim I show two methods of using Keku connectors for scribing/attaching cabinet trim. While the holes can be drilled with a boring machine, I wanted a faster/easier way. While the scribe tool can be adjusted in 32mm (1-1/4") increments, it doesn't require that the cabinets be built using the 32mm system.
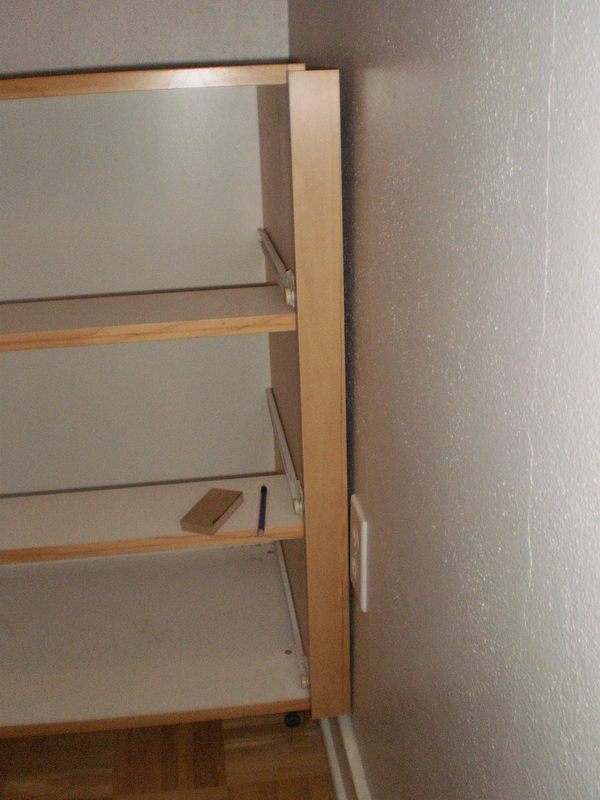
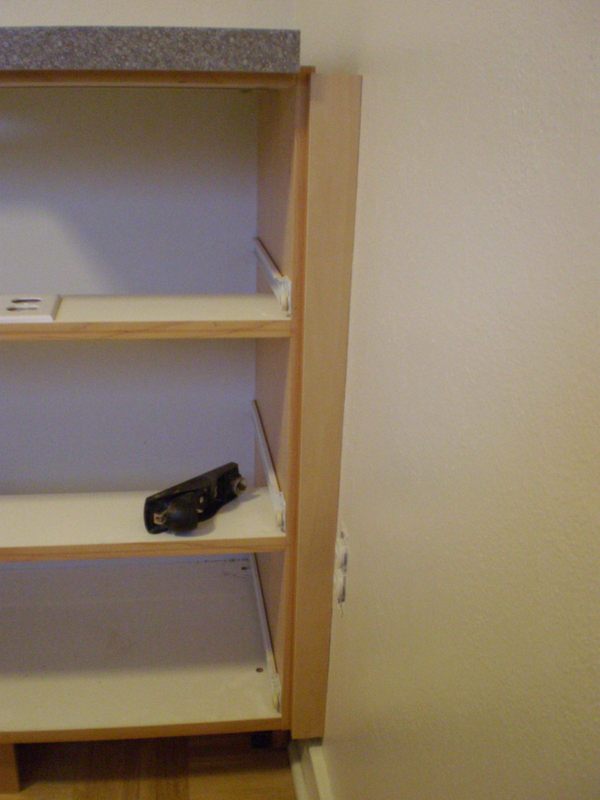
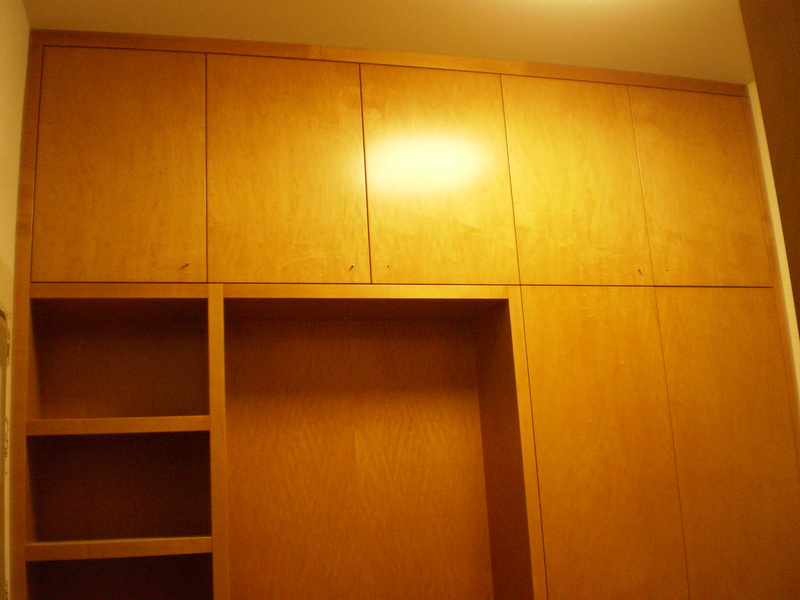
If you click on the image and follow the "Next" buttons (at the top-right of the page), you can follow the process from drilling the box side to setting the scribed trim. The only requirement is that the fingers be placed an equal distance from each stop and that you choose top or bottom indexing, i.e. a stop is always placed against the top or bottom of the piece being drilled. In the example I used bottom indexing because the counter overlaps the cabinet (the trim is 8mm shorter than the cabinet).
Videos @ YouTube
A flush/inset face and wall return demo (first attempt and not very good)
A simple scribe, from start to finish in real time (7min.). Instead of using the jig, a tape measure and a single 'finger' were used (still not a very good video).
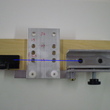
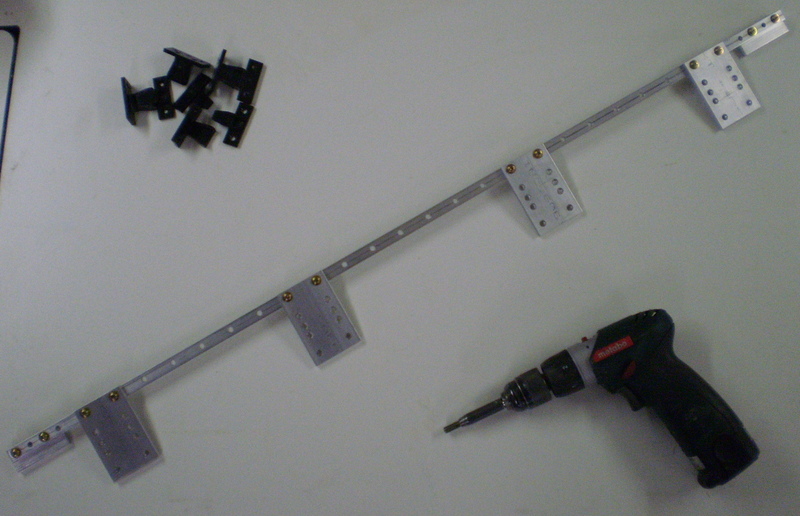
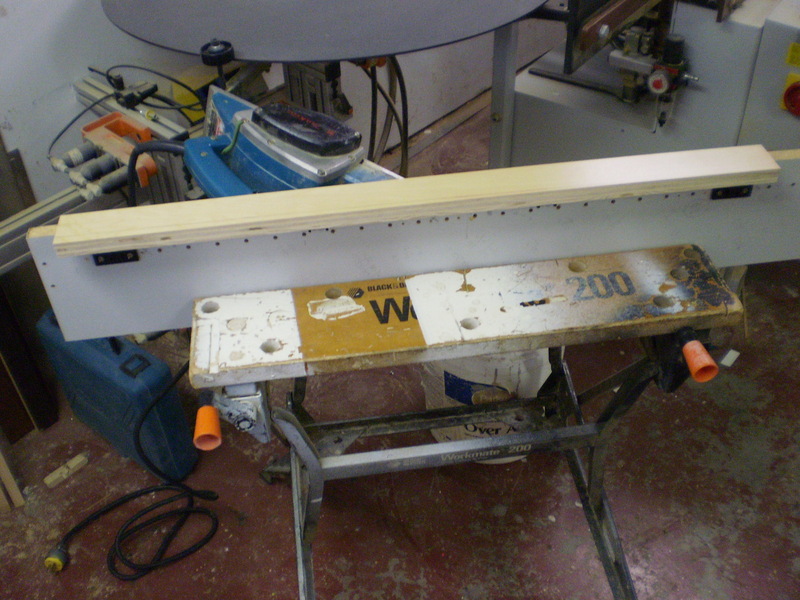
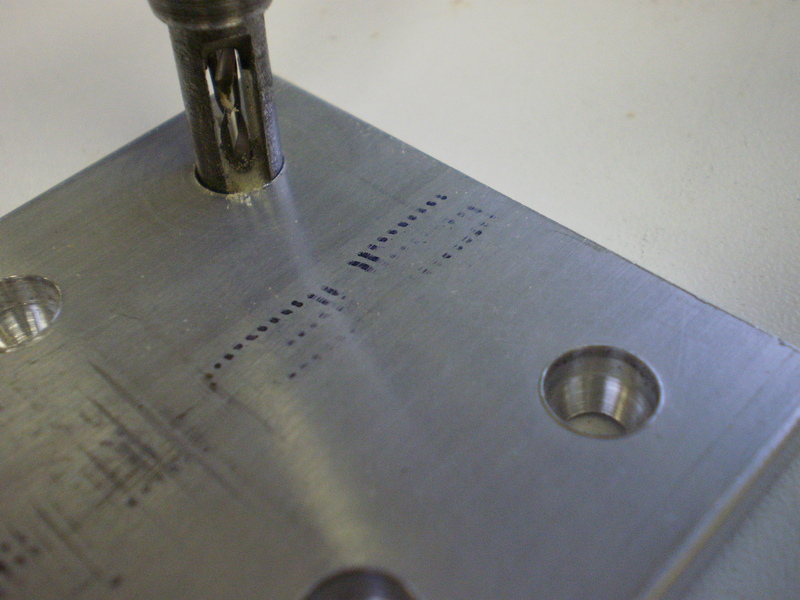
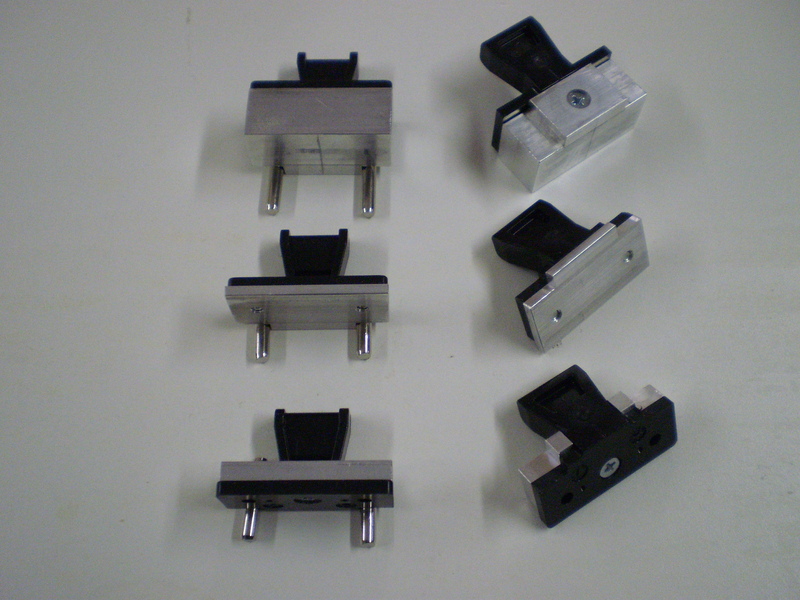
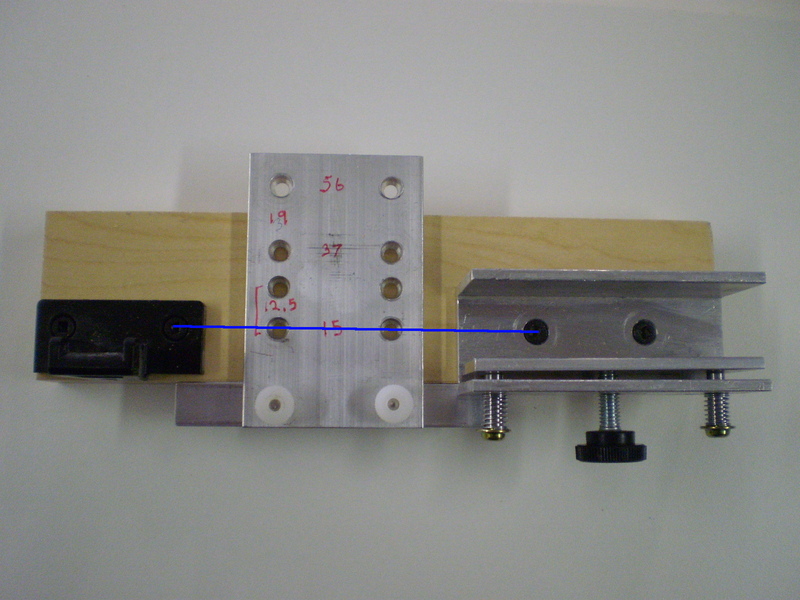
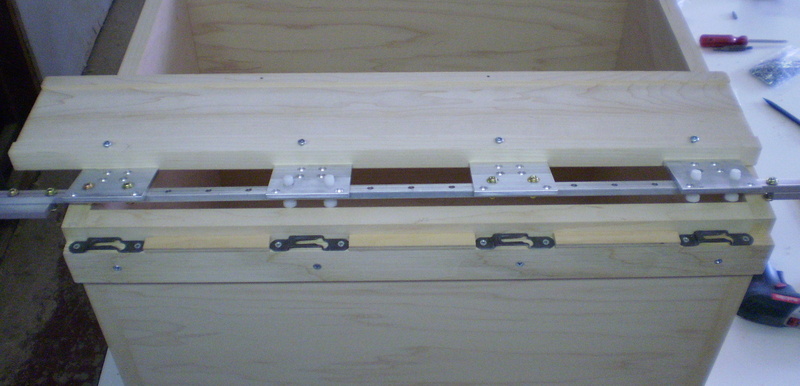
The jig is made of aluminum and consists of a 1/2 x 1/4" bar (...now 1x1/2 T track), 2" wide x 3/16" thick fingers and 1" wide x 1/4" thick stops. The bar has 5mm holes spaced 32mm apart (16mm at the ends). The fingers can have VixBit holes or drill bushings and have 5mm locating pins to mount them to the bar. A tape measure and a single finger can be used to mark/drill long runs. The distance/spacing of the holes/bushings from the bar is dependent on the desired trim thickness, setback and/or overlay. The stops have holes 16mm apart and also mount to the bar with 5mm locating pins. Stop spacing can be any increment of 32mm +/- 8 or 16mm.
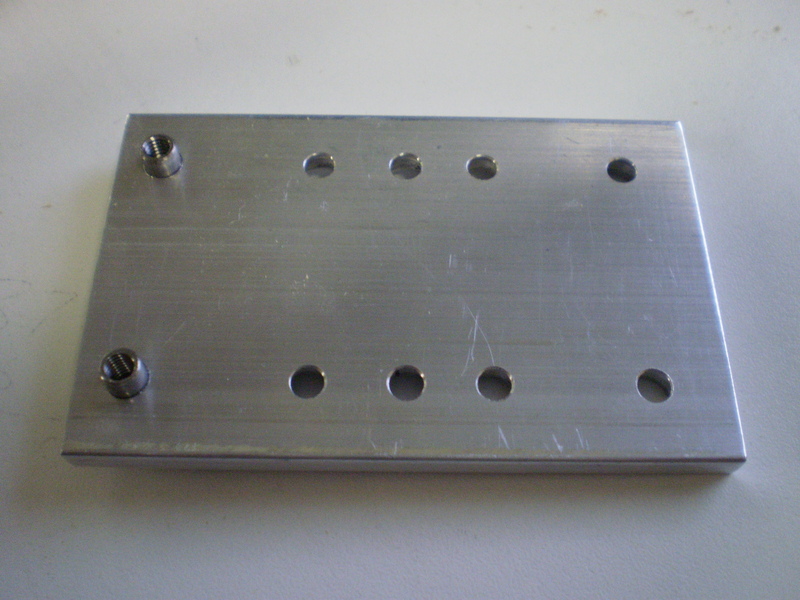
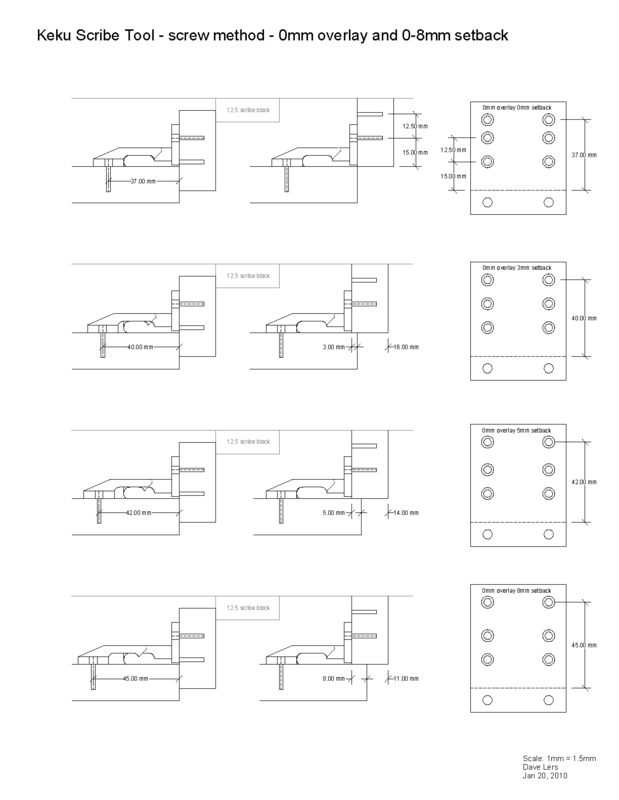
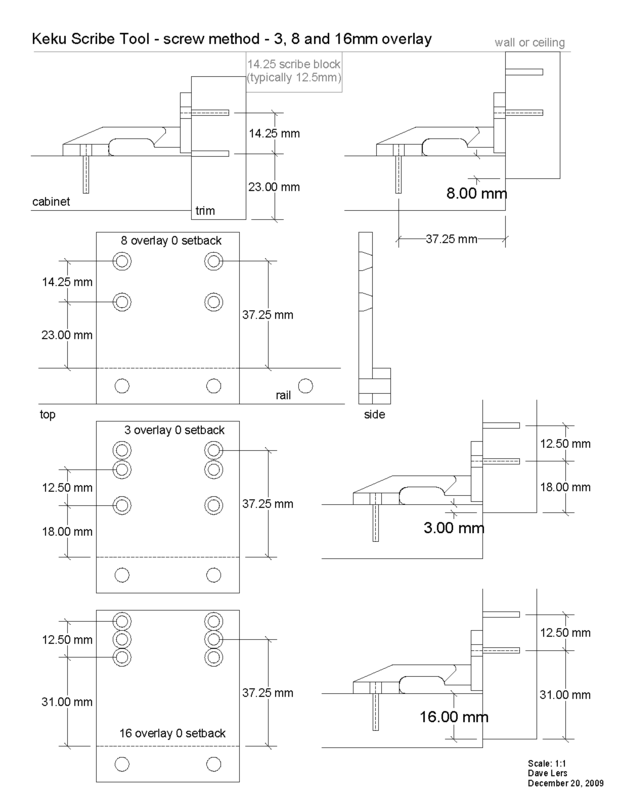
There are three indexing methods - screws, 5mm pins and brackets. With the screw method (images) two sets of holes are drilled, one set is for marking the scribe line on the trim and the other for mounting the trim. A VixBit can be used to drill all holes. With the screw method 0 to ~8mm setbacks or 3, 8 and 16mm overlays are possible.
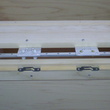
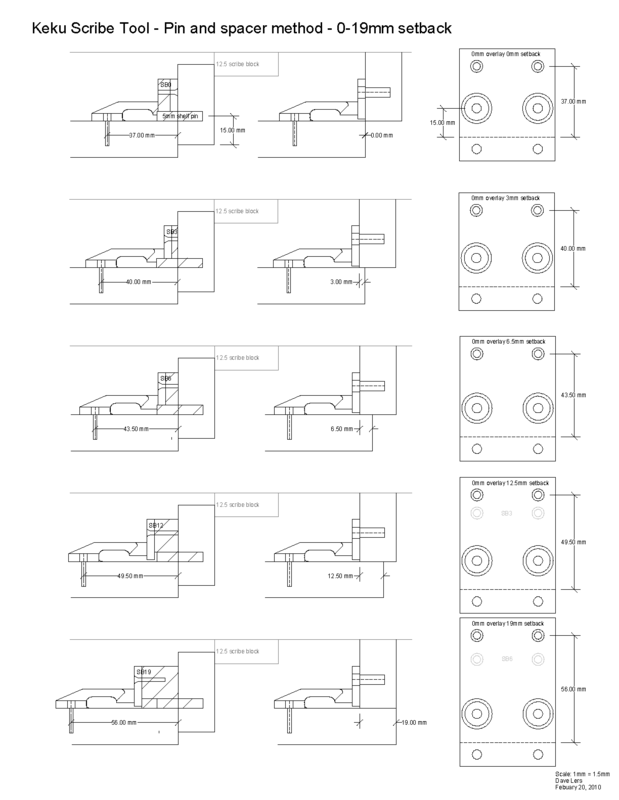
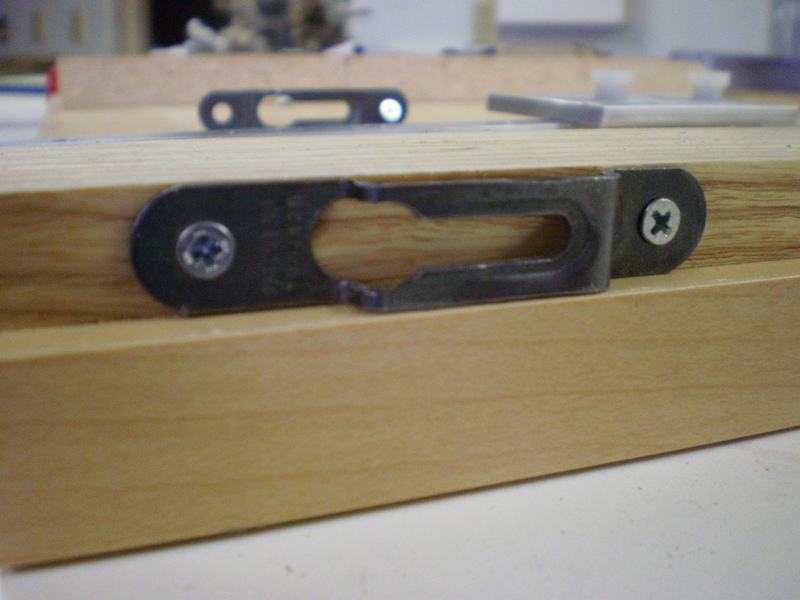
With the pin method (the videos) a single set of 5mm holes is drilled in the trim (drill bushings in the fingers). A 5mm shelf pin is used to index the trim for marking and a system screw is used in the same hole for attaching the bracket / mounting the trim. With this method larger setbacks (0-19+ mm) are possible using built up connectors that hold the trim while marking it.
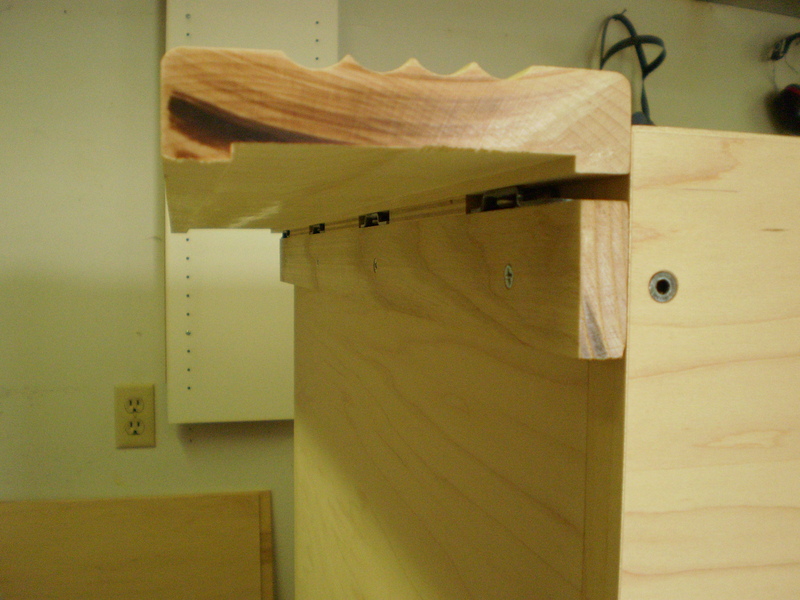
 ... It is also possible to use EuroScribe-like brackets (works better than built up connectors for inset scribes) to hold the trim for marking and/or cutting with the QuickScribe. The bracket is mounted to the trim using the same holes that will be used to mount the Keku connector. The brackets shown can do inset or overlay trim. Modified EuroScribe brackets (tongue removed, screw holes added) might be a better design if you only do inset trim... This bracket is also the best way I have found to scribe inset toe-kicks (I used to use the pin method and shims under the kick board to push the pins against the bottom of the box). While I have been mounting toe-kicks with Keku clips, I'll likely use this method with leg clips as well (to-do: leg clip fingers so everything is on the bar and can be bored with a single setup). Only a few Keku clips are needed and locating them between bulkheads makes this method compatible with leg clips - provides additional kick board support on wide boxes.
Currently the jigs are hand made on a milling machine that has +/- .01mm digital accuracy. While this method allows for custom setbacks/overlays, it makes for a relatively expensive jig. It would help to know what others want and use for scribe trim overlay/setback and material. Coming up with a limited set of options would allow production/reasonable pricing. My personal preference is for the trim to always be flush with the door face (not this). This requires using 5/4 or 4/4 H&M stock for the trim. I easily get the 21-22mm thickness I need from 4/4 H&M.
[ comment | link | top ]
 Mod-eez keyhole connectors are a better option in some applications. One side of the jig fingers have holes for drilling the bracket mounting holes (mounted). The other side of the fingers are for drilling the trim screw holes. There are four holes so that the fingers work with the keyhole brackets facing up or down and to allow for shifting the trim 12.5mm/.5" when marking/mounting overlay scribe trim. These particular fingers were designed for mounting recessed trim using #6 screws and the hole spacing is such that the trim gets pushed tight against the box.
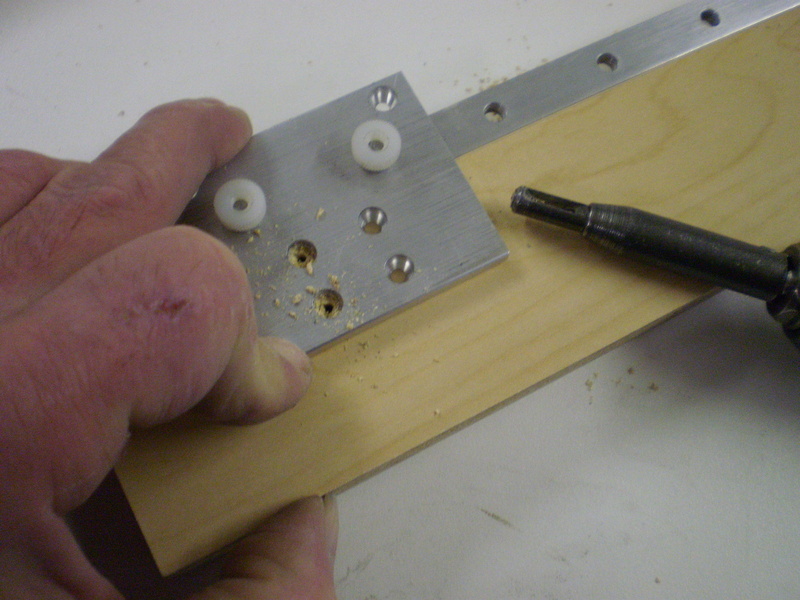
For the same job as the above example images, I used Mod-eez connectors to mount the trim to the wall as well. I used a piece of 1/4" MDF with 1/4" holes and a Vix-Bit to drill pilot holes into the wall. With these particular brackets, the layout is easy because the wall/trim screw holes and bracket mounting holes (open end) work when drilled offset by 32mm. I laid out the MDF and trim using a True32 tape measure (marked in 32mm increments).
[ comment | link | top ]
Flex32 Jig
The Keku Scribe Tool is quickly morphing into an all purpose jig. It can also be used for Mod-eez keyhole connectors (scribes and panels), drilling door pulls, scribing/mounting applied ends, system holes, doweling, etc. More later.
Keku Scribe Tool
 The Keku Scribe Tool makes it easy to securely and accurately index and hold trim - for marking, sizing and mounting - using Keku connectors. In Scribing Cabinet Trim I show two methods of using Keku connectors for scribing/attaching cabinet trim. While the holes can be drilled with a boring machine, I wanted a faster/easier way. While the scribe tool can be adjusted in 32mm (1-1/4") increments, it doesn't require that the cabinets be built using the 32mm system.
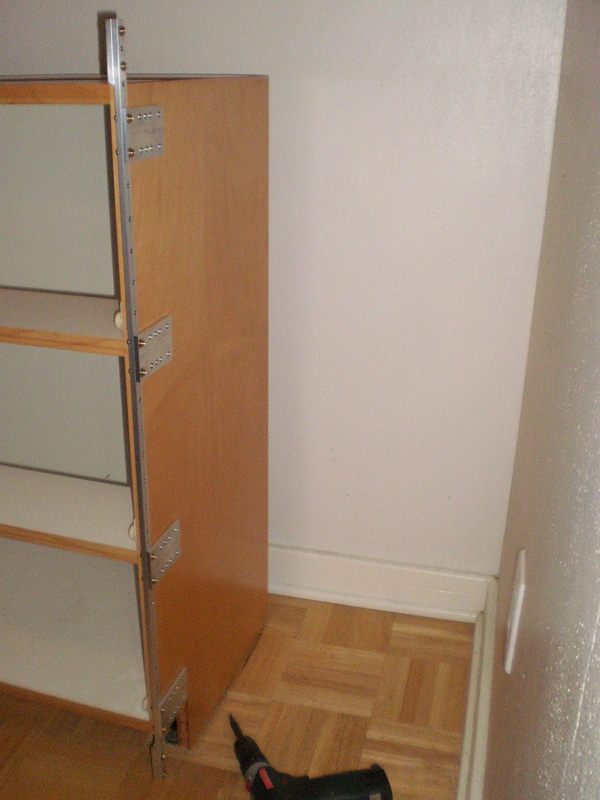
If you click on the image and follow the "Next" buttons (at the top-right of the page), you can follow the process from drilling the box side to setting the scribed trim. The only requirement is that the fingers be placed an equal distance from each stop and that you choose top or bottom indexing, i.e. a stop is always placed against the top or bottom of the piece being drilled. In the example I used bottom indexing because the counter overlaps the cabinet (the trim is 8mm shorter than the cabinet).
Videos @ YouTube
A flush/inset face and wall return demo (first attempt and not very good)
A simple scribe, from start to finish in real time (7min.). Instead of using the jig, a tape measure and a single 'finger' were used (still not a very good video).
The jig is made of aluminum and consists of a 1/2 x 1/4" bar (...now 1x1/2 T track), 2" wide x 3/16" thick fingers and 1" wide x 1/4" thick stops. The bar has 5mm holes spaced 32mm apart (16mm at the ends). The fingers can have VixBit holes or drill bushings and have 5mm locating pins to mount them to the bar. A tape measure and a single finger can be used to mark/drill long runs. The distance/spacing of the holes/bushings from the bar is dependent on the desired trim thickness, setback and/or overlay. The stops have holes 16mm apart and also mount to the bar with 5mm locating pins. Stop spacing can be any increment of 32mm +/- 8 or 16mm.
There are three indexing methods - screws, 5mm pins and brackets. With the screw method (images) two sets of holes are drilled, one set is for marking the scribe line on the trim and the other for mounting the trim. A VixBit can be used to drill all holes. With the screw method 0 to ~8mm setbacks or 3, 8 and 16mm overlays are possible.
With the pin method (the videos) a single set of 5mm holes is drilled in the trim (drill bushings in the fingers). A 5mm shelf pin is used to index the trim for marking and a system screw is used in the same hole for attaching the bracket / mounting the trim. With this method larger setbacks (0-19+ mm) are possible using built up connectors that hold the trim while marking it.
 ... It is also possible to use EuroScribe-like brackets (works better than built up connectors for inset scribes) to hold the trim for marking and/or cutting with the QuickScribe. The bracket is mounted to the trim using the same holes that will be used to mount the Keku connector. The brackets shown can do inset or overlay trim. Modified EuroScribe brackets (tongue removed, screw holes added) might be a better design if you only do inset trim... This bracket is also the best way I have found to scribe inset toe-kicks (I used to use the pin method and shims under the kick board to push the pins against the bottom of the box). While I have been mounting toe-kicks with Keku clips, I'll likely use this method with leg clips as well (to-do: leg clip fingers so everything is on the bar and can be bored with a single setup). Only a few Keku clips are needed and locating them between bulkheads makes this method compatible with leg clips - provides additional kick board support on wide boxes.
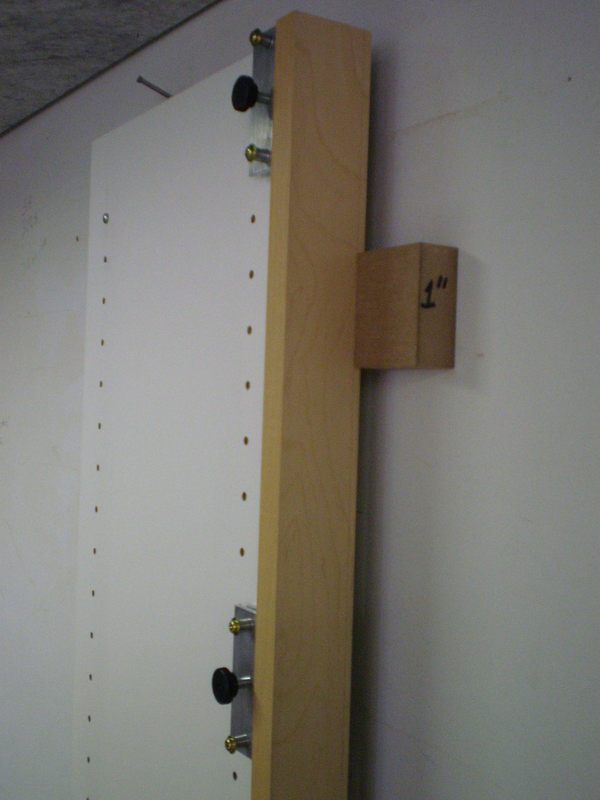
Currently the jigs are hand made on a milling machine that has +/- .01mm digital accuracy. While this method allows for custom setbacks/overlays, it makes for a relatively expensive jig. It would help to know what others want and use for scribe trim overlay/setback and material. Coming up with a limited set of options would allow production/reasonable pricing. My personal preference is for the trim to always be flush with the door face (not this). This requires using 5/4 or 4/4 H&M stock for the trim. I easily get the 21-22mm thickness I need from 4/4 H&M.
[ comment | link | top ]
Mod-eez
 Mod-eez keyhole connectors are a better option in some applications. One side of the jig fingers have holes for drilling the bracket mounting holes (mounted). The other side of the fingers are for drilling the trim screw holes. There are four holes so that the fingers work with the keyhole brackets facing up or down and to allow for shifting the trim 12.5mm/.5" when marking/mounting overlay scribe trim. These particular fingers were designed for mounting recessed trim using #6 screws and the hole spacing is such that the trim gets pushed tight against the box.
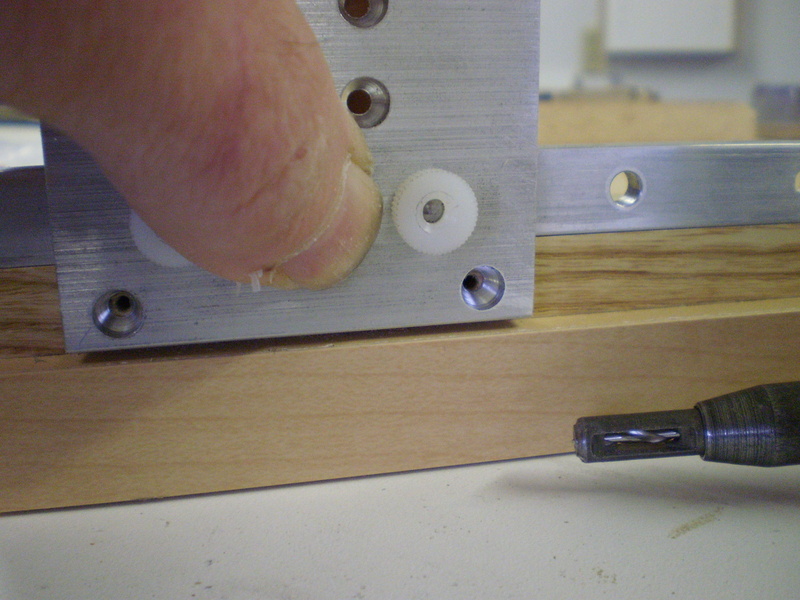
For the same job as the above example images, I used Mod-eez connectors to mount the trim to the wall as well. I used a piece of 1/4" MDF with 1/4" holes and a Vix-Bit to drill pilot holes into the wall. With these particular brackets, the layout is easy because the wall/trim screw holes and bracket mounting holes (open end) work when drilled offset by 32mm. I laid out the MDF and trim using a True32 tape measure (marked in 32mm increments).
[ comment | link | top ]